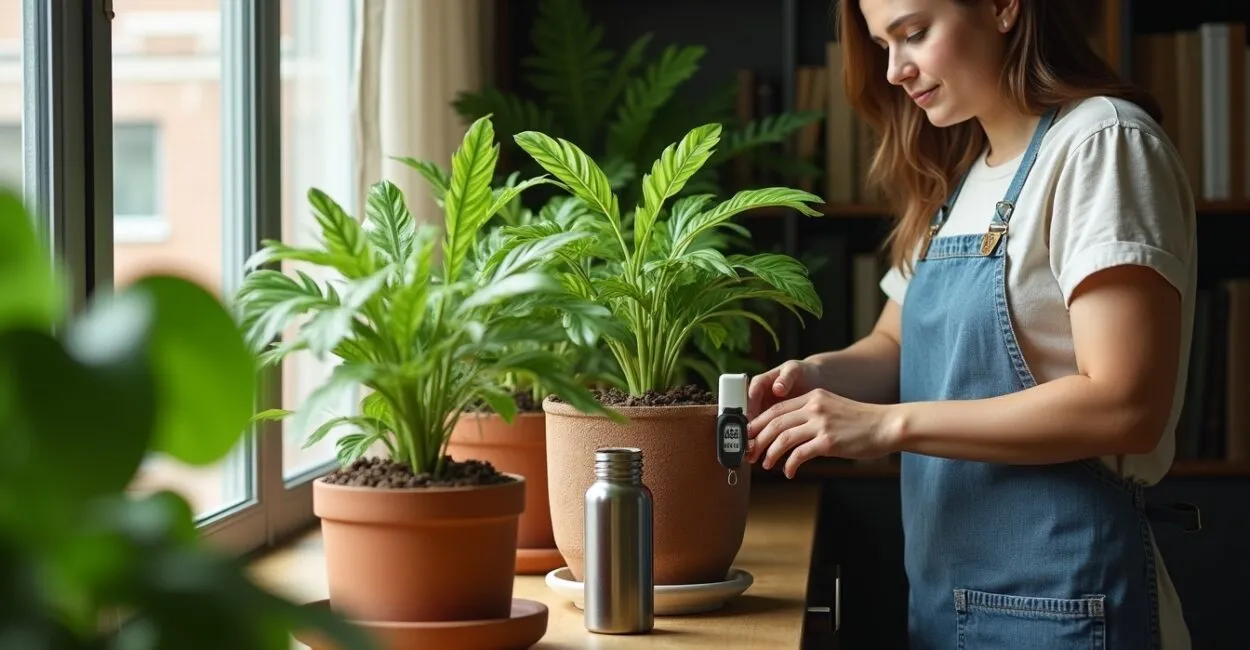
This term refers to pteridophytes commonly found in shaded environments. They are characterized by divided fronds and spore-based reproduction, with wide physiological differences among species and adaptations to local microclimates. As a technical professional, I recognize their aesthetic and ecological importance.
Ferns face practical challenges when grown at home, from improper watering to poorly drained potting mixes, and require careful, precise care. I share practical observations on placement, watering, and pest control, with a focus on consistent results.

Key Takeaways
- Identify species and choose them based on the room’s light and humidity.
- Use an airy potting mix with balanced moisture retention; follow the recommended formula.
- Water in controlled amounts to prevent rot and osmotic stress.
- Choose indoor locations that support photosynthesis without scorching fronds.
Ferns: Biology, Morphology, and Basic Requirements
I’ll start with the botanical basics to explain the physiological processes that affect plant health and growth, connecting leaf structure to water and nutrient needs. I’ll also cover how these traits guide decisions about potting mix, watering, and microclimate.
Leaf Structure and What It Means for Care
Fern fronds have divided blades that increase photosynthetic area without causing excessive water loss. Understanding leaf thickness and cuticle pore density is key to adjusting watering frequency. In assessing morphology, I consider thin fronds a sign that a plant needs shade and high humidity, while leathery fronds can tolerate more light. This assessment helps guide the choice of location in the home.
Understanding sori and sporangia informs propagation practices, such as division, and helps with disease control, reducing losses from fungal diseases caused by improper care.
Physiology: Photosynthesis, Transpiration, and Nutrition
Photosynthesis in ferns is most efficient in diffuse light with stable humidity. Abrupt changes between day and night increase water stress and create opportunities for fungal diseases. Balanced nutrient levels prevent necrosis and chlorosis. My routine includes visual checks and careful applications of balanced fertilizer to reduce the risk of salt buildup in the potting mix.
Moderate transpiration calls for a potting mix that retains moisture without becoming waterlogged. Combining organic and inert particles helps ensure continuous oxygen flow to the roots.
Reproduction and Propagation: Safe Practices
I propagate ferns from spores when needed, but prefer division because it is more predictable. The right technique reduces stress on the parent plant and improves the seedlings’ survival rate. Preparing sterile potting mix and maintaining a humid environment for the first 30 days reduces pathogen-related losses. I’ve seen the best results with controlled relative humidity of 60–70%.
Understanding reproductive cycles makes it possible to schedule pest and disease management and fertilization with less disruption to reproduction, preserving the collection’s vigor and ornamental appearance.
- Choose species suited to your indoor microclimate.
- Adjust the potting mix to balance aeration and moisture retention.
- Avoid overfertilizing and waterlogging.
These points summarize practical decisions that directly affect a fern’s longevity and appearance. I recommend identifying the species before deciding how to care for it or where to place it.
Where to Place Ferns at Home: Light, Airflow, and Microclimate
Choosing a spot for ferns indoors requires considering the light spectrum and intensity, airflow, and humidity levels. I’ll explain how to balance these factors to reduce stress and support photosynthesis, and point out locations that can prevent sunburn and excessive dryness.
Ideal Light and How to Assess Your Space
Indirect, filtered light is best for most species and reduces the risk of photoinhibition. Simple measurements with an app or observations of shadows can help you assess a spot accurately. Locations near east-facing windows generally offer a good balance of morning light and protection during the hottest part of the day, reducing the need for artificial shade.
When needed, diffusing screens or sheer curtains can adjust the available PAR without restricting airflow, which is critical for leaf health.
Airflow and Humidity Control
Steady but gentle airflow prevents stagnant microclimates that encourage fungal growth. Balancing fresh air with adequate humidity is essential to disease prevention. Humidifiers and pebble trays help precisely control local relative humidity. I adjust these systems with the seasons to avoid harmful fluctuations.
Avoid exposing ferns to cold or dry drafts, which can cause loss of turgor and make plants more susceptible to pests. Protect them in high-traffic areas.
Practical Placement by Room
In the living room, I favor spots with diffused light and moderate airflow. Bathrooms with windows can work well if they’re ventilated, since they combine humidity with the indirect light that supports growth. Kitchens can be challenging because of heat and changing steam levels, so I keep ferns away from heat sources and use barriers to limit temperature exposure.
Bedrooms with east-facing windows can also work, as long as the plants are protected from cold nighttime drafts. My rule is to keep humidity and light within the species’ physiological limits.
- Keep sensitive fronds out of direct sunlight.
- Don’t place ferns near air conditioners or heaters.
- Don’t leave them in unventilated areas for extended periods.
Placement problems often show up gradually. I watch for early signs and adjust the microclimate before the plant enters an irreversible decline.
Potting Mixes and Formulations: Moisture Retention, Drainage, and pH

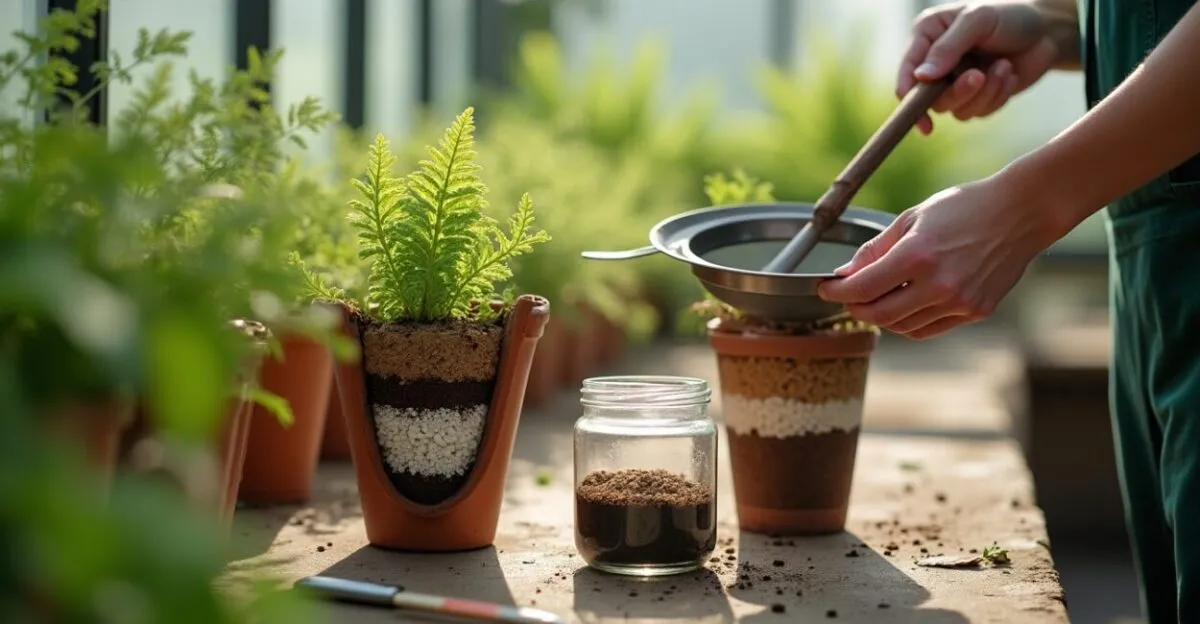
Potting mix is essential for root health and water supply. I assess its composition (organic versus inert materials), particle size, and pH, and recommend formulas that balance moisture retention and aeration to reduce root rot and nutrient deficiencies.
Ideal Components and Proportions
I recommend a mix of coconut coir, perlite, and well-aged compost in proportions that vary by species. Aim for 40–60% loose organic matter and 40–60% inert materials to ensure good oxygen flow. I prefer medium-sized particles to prevent compaction and support drainage. Very fine particles retain too much water and increase the risk of root suffocation, while very coarse particles reduce moisture retention.
Seasonal adjustments can include adding more organic matter in winter for extra moisture retention, while maintaining good aeration to prevent anaerobic pathogens from multiplying.
pH and Nutrient Availability
Ferns generally tolerate slightly acidic soil. I keep the pH between 5.5 and 6.5 to optimize iron and manganese availability, which are essential for preventing chlorosis indoors. When needed, I check the potting mix’s electrical conductivity (EC). A high EC indicates salt buildup from overfertilizing and calls for flushing the mix and carefully adjusting the nutrient regimen.
I supplement with chelated micronutrients when I identify specific symptoms. Targeted corrections prevent structural damage and preserve vigor without overloading the root system.
Refreshing and Replacing Potting Mix
I partially replace the potting mix every 12–18 months to replenish nutrients and restore its physical structure. Potting up minimizes shock and supports continued growth. For a full repot, I prepare a well-drained mix and add layers of inert material to prevent roots from coming into direct contact with pooled water, reducing the risk of root rot.
I record and monitor how plants respond after repotting so I can adjust watering and fertilization as needed and maintain a high survival rate.
- Avoid compacted mixes and excessive fine material.
- Don’t use garden soil without amending it.
- Avoid overfertilizing with soluble nitrogen.
Potting mix problems directly affect root physiology. I adjust formulas based on symptoms and the results of small, controlled trials in test pots.
Water and Watering: Techniques, Frequency, and Quality
I manage watering by combining visual checks, pot weight, and knowledge of local weather to prevent overwatering and underwatering. Here, I describe practical ways to assess a plant’s water needs and adjust watering frequency based on the season and vegetative growth.
Water Quality and Treatment
Chlorinated or high-salt water can harm roots. I prefer filtered or dechlorinated water and, when necessary, use reverse osmosis to prevent harmful ions from building up and affecting growth. I occasionally use water conditioners and adjust the pH when water is too alkaline. This helps reduce deficiency symptoms and improve the uptake of essential micronutrients.
I monitor water hardness and have run tests showing fewer leaf spots when using water with lower salinity, confirming its direct effect on plant health.
Watering Methods: Soaking, Drip Irrigation, and Misting
A short soak is effective for deep rehydration, while adjusted drip irrigation provides a steady supply without waterlogging. Supplemental misting helps maintain suitable moisture on the fronds. I prefer systems that allow for measured, timed watering, reducing human error and conditions favorable to pathogens. I calibrate emitters to the pot’s volume.
The right combination of methods depends on the environment. In dry apartments, daily misting and a weekly soak provide a better balance of humidity and root aeration.
Watering Frequency and Practical Signs
Watering based on pot weight and frond appearance avoids rigid schedules that fail to account for seasonal and microclimate variations. Lifting the pot is a simple, reliable test. Wilting fronds, dry edges, or brown tips can indicate too much or too little water, depending on the context, so diagnose the problem carefully before correcting it.
I follow a flexible schedule that prioritizes the plant’s response. Gradual changes reduce shock and support recovery from prolonged water stress.
Pest and Disease Control: Identification and Treatment
I identify signs of infestation and apply carefully calibrated physical and chemical treatments. I explain how to distinguish biotic from abiotic causes and recommend preventive and corrective measures, with an emphasis on minimizing resistance and environmental impact.
Common Pests and Diagnostic Signs
Spider mites, mealybugs, and aphids are common pests. Signs include cottony clusters, speckling, and distorted fronds. Careful assessment is crucial to avoid inappropriate treatments that can obscure the diagnosis. I use a magnifying glass and systematic monitoring to catch early signs and act promptly. Mechanical control can eliminate small populations without systemic insecticides.
Keeping a record of incidents for each plant helps me connect previous care practices with outbreaks, improving prevention and reducing pesticide use.
Fungal and Bacterial Diseases: Prevention and Control
Root rot and leaf spots often result from excess moisture. I prioritize cultural practices to reduce the pathogen load, using specific fungicides when necessary. Good airflow, well-drained potting mix, and controlled watering reduce risk. When treating plants, I rotate active ingredients to prevent resistance and preserve long-term effectiveness.
In advanced cases, I cut off affected parts with sterilized tools and repot the plant in clean potting mix to interrupt infection cycles. This helps restore vigor in many plants.
Chemical Treatments and Organic Alternatives
Alternatives such as neem oil and potassium soap can work in the early stages and preserve beneficial organisms. I follow label directions and test them first to avoid phytotoxicity. I use insecticides and miticides selectively, observing safety intervals and rotating active ingredients. This integrated approach minimizes resistance and unintended effects.
Documenting treatments and plant responses helps refine care protocols, reducing the need for repeated applications and improving overall plant health.
- Inspect plants regularly with a magnifying glass.
- Don’t apply chemicals without an accurate diagnosis.
- Avoid waterlogging, which encourages pathogens.
Preventive practices reduce pesticide use and preserve the microenvironment’s balance. In my experience, consistent cultural care is more effective than reactive treatments.
Propagation, Repotting, and Pruning: Advanced Techniques
Propagating and repotting ferns requires knowledge of healing and root care. I describe division, rare leaf propagation, and selective pruning to encourage renewal, with an emphasis on minimizing shock and helping new plants establish successfully.
Division and Selecting Parent Plants
Dividing plants during the growing season reduces stress and encourages root development. I select vigorous parent plants and make clean cuts with disinfected tools to preserve meristematic tissue. After division, I maintain high humidity and low light for two to four weeks to support rooting, then gradually adjust conditions until the plants are fully established.
Recording a plant’s genetic provenance and growing conditions helps me select parent plants for ornamental purposes or conservation, improving propagation success.
Repotting Without Shock: Best Practices and Timing
The ideal time to repot is during active growth. I prepare a new pot with pre-moistened potting mix and avoid direct sunlight for the first few weeks to reduce water loss. Handling the roots as little as possible and keeping the root ball intact preserves mycorrhizae and beneficial microbes, speeding recovery and the return to steady growth.
After repotting, I monitor watering and look for signs of adjustment, making immediate changes to watering and the microclimate as needed.
Pruning and Replacing Fronds
Selective pruning removes damaged fronds and encourages balanced growth. I cut at the base at an angle to prevent water from pooling and reduce the risk of pathogens. Periodic renewal improves appearance and photosynthetic efficiency. I monitor the plant’s response and adjust pruning frequency based on its vigor and growth rate.
For ornamental species, shaping respects the plant’s natural form, preserving its physiological integrity and extending its life without compromising reproduction.
| Feature | Recommendation | Impact |
|---|---|---|
| Potting mix | Coconut coir + perlite, 50/50 | Better drainage and balanced moisture retention |
| Watering | Weekly soak + daily misting | Reduces stress and keeps fronds moist |
| Placement | Filtered, diffused light from an east- or south-facing window | Supports photosynthesis without scorching fronds |
Ongoing Care and Advanced Diagnosis
Keeping ferns healthy is an ongoing process that calls for objective indicators such as pot weight, frond color, and structural strength. I describe monitoring routines, recordkeeping, and carefully calibrated interventions to ensure long-term stability.
Monitoring Systems and Recordkeeping
Records of watering, fertilization, and treatments make it possible to objectively link care practices with plant responses. I use spreadsheets and sequential photos for long-term analysis and data-based decision-making. Simple measurements, such as pot weight and potting mix texture, can provide early warning that adjustments are needed, helping prevent reactive and harmful interventions.
Combining environmental data with plant performance makes it possible to refine care protocols continuously, improving efficiency and reducing failure rates in home collections.
Interpreting Symptoms and Taking Corrective Action
Chlorosis, necrosis, and wilting can point to different causes. I use the plant’s care history and environmental conditions to make a differential diagnosis and recommend precise corrective steps. Considering the potting mix’s clarity, smell, and root condition helps determine whether to flush it, repot the plant, or apply a treatment, reducing exposure to pathogens.
Prompt, targeted action prevents plant loss and reduces replacement and treatment costs, underscoring the importance of continuous, attentive care.
Seasonal Planning and Preparing for Climate Changes
I adapt watering and fertilizing schedules to the seasons, anticipating shorter days and storms. Seasonal planning minimizes stress and stabilizes annual plant growth. During dry spells, I increase misting and protect plants from cold drafts. In hot summers, I prioritize temporary shade and more frequent moisture checks.
This preventive approach reduces sudden fluctuations and creates a predictable growing environment, improving consistency and appearance across the collection.
- Check pot weight weekly.
- Keep a log of treatments and plant responses.
- Don’t make decisions based only on surface appearance.
Careful monitoring and recordkeeping reduce uncertainty and improve interventions. In my experience, they boost productivity and reduce the need for drastic corrections.
| Procedure | Benefit | Typical frequency |
|---|---|---|
| Partial potting mix replacement | Replenishes nutrients | 12–18 months |
| Pest and disease inspection | Early pest detection | Weekly |
| Watering based on pot weight | Prevents waterlogging | As needed |
Take Action to Improve Your Fern Care
I recommend starting with a detailed assessment of your indoor environment and choosing one or two species suited to the available light. Set up a simple monitoring routine based on pot weight and record each intervention so you can assess the results objectively. Controlled watering, suitable potting mix, and regular inspections reduce risk and support recovery. My advice is to make small, gradual changes and monitor the results to ensure lasting, attractive growth.
Frequently Asked Questions
How Often Should You Water Ferns in an Apartment?
Watering frequency depends on the potting mix, pot size, and microclimate. My rule of thumb is to check the pot’s weight and water when it feels noticeably lighter, usually once a week. Adjust based on the season and the plant’s response to prevent waterlogging and prolonged water stress.
How Can You Identify and Treat Mealybugs on Ferns?
Look for waxy clusters and sticky spots. To start, I clean the plant by hand with diluted isopropyl alcohol and potassium soap, repeating as needed until the infestation is under control. For persistent infestations, I use neem oil, first testing it on a small area to check for phytotoxicity.
What’s the Best Way to Correct Chlorosis?
Chlorosis caused by iron deficiency responds well to chelated iron applied to the leaves and potting mix. I use the recommended doses and monitor the plant’s response over the following days. I also check the potting mix’s pH to ensure the micronutrient is available and adjust it as needed.
When Should You Repot a Fern?
I repot when roots fill the root ball, growth stalls, or the potting mix has broken down. This is usually every 12–18 months. I repot during active growth to reduce shock and support recovery.
Which Fern Species Are Best for Low-Light Conditions?
Species with thin, delicate fronds tolerate lower light better, including Nephrolepis and Microsorum. I choose species based on the available light and humidity, prioritizing those with a proven track record in shaded indoor spaces.
As a professional, I encourage you to take practical steps: assess your space, choose a suitable species, and follow the basic potting mix and watering recommendations. Small, gradual changes and good recordkeeping can quickly and sustainably improve plant health.
My final recommendation is to maintain a routine of inspections and adjustments, prioritizing preventive care and carefully calibrated interventions. This way, you can turn your expectations for beautiful ferns into reliable, lasting results.
Artigos Relacionados
 Home Gardening: How to Grow Your Own Food in a Healthy, Affordable, and Sustainable Way
 Succulents: Easy Indoor Plants and Care Tips
 Micro Habits: 10 One-Minute Changes to Help You Grow
 Bromeliads and Their Special Care
 Building a Legal Career: Steps to Grow in Practice
 Startups: How to Validate Ideas, Grow Fast, and Profit