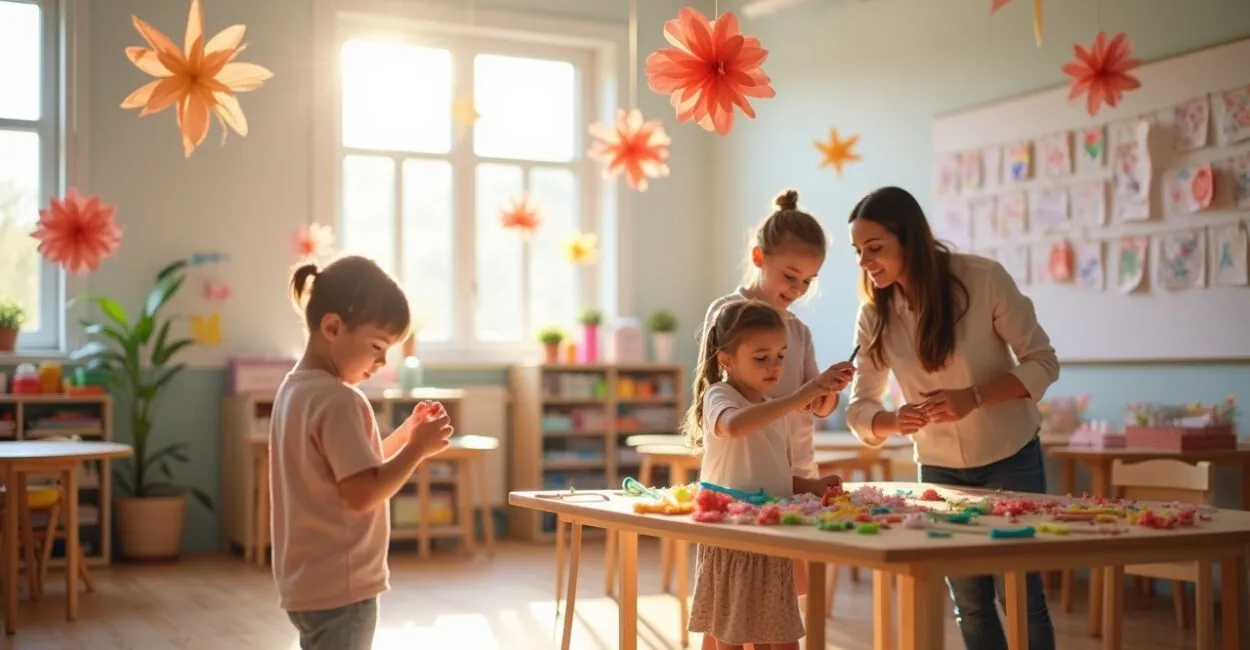
During the week of the celebration, the classroom usually stays in use while the decorations go up. A kid-friendly Mother’s Day classroom display can come together with paper, repurposed materials, and a free wall, without an expensive or complicated setup.

The challenge is usually juggling limited time, different ages, and the daily routine of a shared classroom. A simple plan, with age-appropriate tasks and decorations that are easy to put away, helps create a welcoming space without disrupting activities.
How to plan a Mother’s Day classroom display for kids
A school’s Mother’s Day display works best when it starts with three decisions: the visual theme, which part of the classroom will be set aside for the tribute, and how much time the class will have to put everything together. Once those choices are made, paper, tape, and repurposed materials are usually enough to create a display board and a few coordinated touches.
In this context, classroom decor means the temporary arrangement of visual elements and objects in a learning environment. Put simply, it’s choosing where to place each decoration without blocking walkways, airflow, access to supplies, or the view of the board. That matters just as much as appearance.
Set aside 30 to 60 minutes for adults to put together a simple display, in addition to the time children need to make the pieces. The timeline depends on the size of the display, how many projects there are, and how long they need to dry. To keep costs low, start with what the school already has: paper with one blank side, leftover poster board, and clean boxes. If you need to buy supplies, choose a few items that can be used for multiple projects and check local prices before setting a spending limit.
- Theme: Choose a visual idea, such as a garden, favorite colors, or heartfelt messages.
- Space: Pick a wall or bulletin board away from doors and walkways.
- Materials: Take inventory before shopping. Set out child-safe scissors, paper, tape, and colored pencils for supervised use.
What can make setup difficult—and how to avoid it
The most common problem is making decorations before deciding where they’ll go. The class makes flowers, cards, and drawings, then runs out of space and time to arrange everything. Another common pitfall is using too many hanging decorations: they can fall, block the lighting, or get in the way.
Before hanging anything, observe the classroom during a lesson. Check which walls other classes use, where the outlets, windows, and cabinets are, and whether anything is within reach of young children. Tape or adhesive may also peel paint off the wall; test it in an inconspicuous spot or attach the decorations to a freestanding cardboard display.
When a classroom is shared, decorations need to be easy to take down and store. Displays attached to a lightweight backing and projects labeled on the back are more practical than pieces stuck directly to the wall. Whether this works depends on school rules and the condition of the surface, so check with the school administration before putting anything up.
Paper flowers and a display board to bring the tribute together

Paper flowers can create a focal point without relying on expensive decorations. To make a simple flower, cut circles or petals from colored paper, layer the pieces, and attach them to a poster board base. An adult can prepare the cutouts for younger children, while older kids draw leaves and help complete the display.
For a background, use kraft paper, poster board, or sheets of reused paper taped together on the back. Leave space between the flowers for drawings, cards, or messages dictated by the children. A school’s Mother’s Day display is easier to read when it has a short title and the projects are spaced out rather than overlapping.
A welcoming display starts with a message that represents the class and leaves room for every child to take part.
Low-cost recycled decorations for walls and tables
Clean cardboard boxes can become frames, display-board backing, or card holders; paper rolls can be turned into stamps for simple shapes. Before reusing packaging, make sure it’s dry and free of staples, sharp edges, residue, or strong odors. Avoid containers that held cleaning products or other chemicals.
For a display table, arrange projects on sturdy, low stands without covering the area children use. If supplies are limited, use drawings, dry fallen leaves, or reused paper. The result can be simple and still work well: each child contributes a picture or message.
Paper garlands, ribbons, and decorations that don’t overwhelm
A garland made of paper circles or a strip of drawings can decorate the classroom entrance. Attach the pieces to an approved support and keep them clear of doors, fans, light fixtures, and walkways. Avoid long ribbons and dangling strings within reach of young children, as they can pose an entanglement risk.
One practical detail that’s easy to overlook: lightweight paper can curl in humid conditions or when air flows in from a window. To keep it from falling during class, reinforce the attachment points and choose smaller pieces rather than one long, heavy strip.
How to include children with age-appropriate, safe activities
Children’s participation should match their age, motor skills, and the level of supervision available. Older kids can draw, cut simple shapes with appropriate school scissors, and write messages. For younger children, an adult can prepare the pieces and offer tasks such as choosing colors, pointing to where a drawing should go, or making marks with chunky crayons.
Children under 3 can help briefly and always with an adult close by: they can sing while watching the display come together, choose between two large sheets of paper, or make a mark with nontoxic paint suitable for their age, following the manufacturer’s instructions. Keep small pieces, buttons, bottle caps, staples, scissors, and hot glue out of reach. The Inmetro website can help you identify toy certification; for art supplies, also check the recommended age and product labeling.
A short activity is enough. Each child can draw a flower on paper, choose a color for the display, or dictate a message for an adult to write down. If a child has difficulty handling a material, offer another way to participate, such as choosing where to place a drawing or explaining what it represents.
Example: In a class with children of different ages, an adult prepares large petals and attaches the display to the wall.
Older children cut out leaves with school scissors under supervision.
Younger children choose colors and draw on large sheets of paper with crayons.
Then the adult arranges the pieces and keeps potentially hazardous supplies out of reach.
The National Common Core Curriculum (Base Nacional Comum Curricular), issued by Brazil’s Ministry of Education, emphasizes participation and self-expression in early childhood education. A classroom display can make room for these experiences as long as the activity is meaningful to the class and doesn’t replace play or learning time.
Lighting, preserving projects, and honoring different families
Keep light fixtures and windows clear, and don’t cover safety notices, exits, or school equipment. To preserve projects in a shared classroom, take a photo of the display before taking it down, label pieces on the back, and store them in a dry envelope or folder. If the school allows it, a portable display reduces the amount of adhesive used on the wall and makes setup easier for another class.
The tribute should also take different family structures into account. Some children may not live with their mother or may prefer to honor another caregiver. A message such as “For someone who takes care of me” lets each child choose whom to dedicate their project to, without having to share personal details about their family with the class.
This doesn’t require changing the whole activity: simply welcome different recipients and avoid asking children to explain their choices. The best approach depends on the class and school guidance; talk with the school administration if you have questions about the event’s wording.
Frequently asked questions about classroom decorations
Can we put everything together in one day?
Yes, if the display is small and the materials are sorted before the activity. To avoid a last-minute scramble, prepare the background and cutouts ahead of time, and let the class create the drawings and messages.
What if we don’t have poster board or colored paper?
Use reused paper, clean wrapping paper, and cardboard boxes with no staples. Drawings made with colored pencils or crayons can also be part of the display.
How can we hang decorations without damaging the wall?
Test the tape in an inconspicuous spot or attach the projects to a cardboard or kraft paper backing. Check with the school before using adhesive, since different paints and wall coverings react differently.
Do children need to take part in the entire setup?
No. They can help with one short step, such as drawing or choosing colors, while an adult handles difficult cutting, hanging, and organizing the space.
Before you begin, choose a clear wall, confirm which materials are available, and plan a way for children of each age to participate. With that plan, the class can create a tribute made by many hands and store the projects without disrupting the classroom’s daily use.
Artigos Relacionados
 Creative Gifts Kids Can Make for Mom
 Educational Projects That Transform Classrooms in 30 Days
 Educational Technology: Tools That Transform Classrooms
 Mother’s Day in Early Childhood Education: 7 Memorable Activities
 Inclusive Environments and Sensory Supports for ADHD: Practical Strategies for Organizing Spaces and Materials to Reduce Distractions
 Classroom Routines and Accommodations for ADHD: Organization and Behavior Management Strategies for Teachers