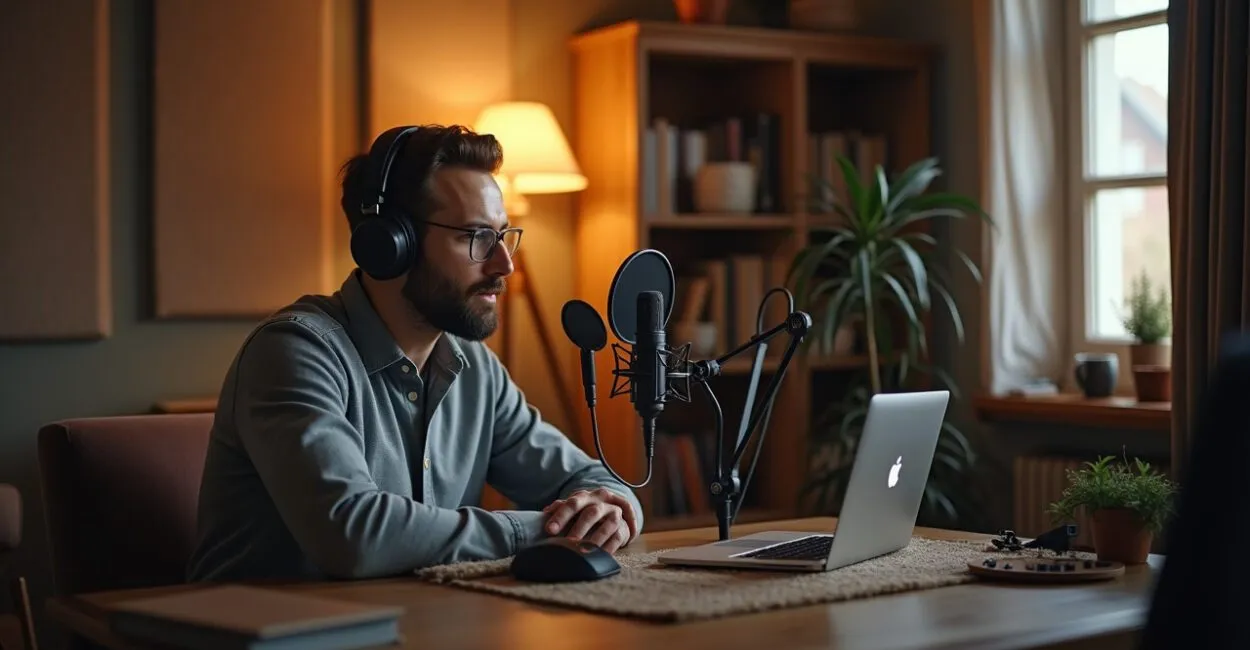
A business podcast can get started with a USB microphone, headphones, and a quiet room; an audio interface, camera, and professional acoustic treatment can wait. When choosing equipment for recording a business podcast, prioritize capturing your voice and controlling your environment.

These two factors usually matter more to the final result than a long list of accessories.
Your investment depends on the format: a solo host can put together a simple setup, while in-person interviews with several people call for additional microphones and connections. This guide is designed to help you compare options and decide what to buy first, without assuming every beginner needs the same kit.
Quick overview
- Minimum equipment: a microphone, headphones, and a compatible computer or phone.
- USB microphone: connects directly to your device without an external interface.
- XLR microphone: requires an interface or recorder with a compatible input.
- Recording space: a quiet room with fewer reflective surfaces helps capture your voice.
- Software: free recording and editing options are available, such as Audacity.
Equipment for recording a business podcast: what to buy first
The minimum equipment you need to start a business podcast is a microphone compatible with your computer or phone, closed-back headphones, and a device to record on. Choose a USB microphone for a simple connection or an XLR setup with an interface if you need more inputs. Record in a quiet room before investing in a camera or acoustic treatment. Closed-back headphones let you hear your own voice and catch noise, pops, or connection issues while recording. A stable stand also helps: holding the microphone can turn any touch or movement into unwanted noise. If your budget is tight, improvise a quiet space and wait to buy accessories until you’ve tested your first episode.
The software can be free. Audacity, for example, records and edits audio; check the latest requirements and versions on the official Audacity website.
For a solo episode, you don’t need to buy a camera, mixer, or editing subscription before you understand your workflow.
What affects the quality of a recorded voice
The voice recording chain includes the sound source, microphone, recording space, connection, and recording level. A microphone captures your voice along with the sounds around it, including fans, traffic, and room reflections. That’s why mic placement and background noise can compromise a recording even when the equipment is expensive.
Position the microphone near your mouth without touching it, and speak toward the capsule according to the mic’s pickup pattern. Keeping a consistent distance helps maintain a steady volume. If your voice peaks or distorts, lowering the input gain is usually more effective than trying to fix the distortion afterward.
A voice recorded close to the microphone and positioned well will usually sound clearer than one captured from a distance in a reverberant room.
Do a short test before each session and listen with headphones. A common mistake is to monitor only the volume: audio can be loud and still contain echo, steady background noise, or plosives—the bursts of air caused by sounds like “p” and “b.” A pop filter can reduce plosives, but it won’t fix inconsistent mic distance or room noise.
USB or XLR microphone: how to choose

USB microphones connect directly to a computer and are usually the simplest choice for one person recording alone. XLR microphones use an analog connection and require a compatible audio interface or recorder, but they make it possible to add more inputs and swap out parts of your setup more easily.
| Factor | USB | XLR |
|---|---|---|
| Initial connection | Directly to a compatible device | Through an interface or recorder with an XLR input |
| Best for | Solo recording and a simple setup | In-person interviews and expandable setups |
| What to check | System compatibility and monitoring | Available inputs, power, and cables |
Read also: Best Entrepreneurship Podcasts: 10 Shows to Listen To
Before you buy, check the pickup pattern, connection, and compatibility with your device. Dynamic microphones are often a practical choice in typical rooms because their close-range pickup can help reduce the amount of room sound captured. That doesn’t make them immune to noise; results still depend on distance, gain, and the room. Shure offers technical resources on microphones and audio production that can help explain these differences.
How to reduce echo without treating the entire room
Acoustic treatment reduces sound reflections within a room; soundproofing limits sound traveling between spaces. They serve different purposes. To start, choose a space away from noise sources with curtains, a rug, or a bookcase, which can help break up reflections compared with an empty room with hard walls and floors.
Read also: Business Podcasts for Beginners
Cheap acoustic foam won’t solve every problem. It can reduce some reflections, especially at higher frequencies, but it won’t block street noise or replace controlling the noise that reaches the microphone. Its effect also depends on the amount, thickness, and placement; installing a few panels in one spot may make little difference to the sound.
These recommendations have limits: a room with a noisy air conditioner or nearby construction may require a different location or a change to your recording schedule. No panel can fix every source of noise, and the right solution depends on the room and the type of sound that’s bothering you.
Audio interface, recorder, and connections: when you need them
An audio interface converts the analog signal from XLR microphones for your computer and provides input controls such as gain. It makes sense when your setup uses XLR microphones, needs more than one input, or requires dedicated monitoring. For a single USB microphone, it’s generally not necessary.
A portable recorder can be useful for interviews outside the studio or as a way to record without relying directly on a computer. Check how many inputs it has, which microphones it supports, and how it transfers files. Each additional connection also means another point to test, such as cables, adapters, and power.
As you expand your setup, make sure each participant has a separate input if you need to adjust voices individually during editing. In an in-person conversation between two people, for example, a single microphone placed between them may capture their voices at different volumes along with more room sound. Two microphones and two inputs give you more control, as long as the recorder or interface supports that setup.
Where to save when building a simple setup
Save money on items that don’t address the main problem with your recording. For a solo podcast, put off buying a camera, mixer, or acoustic panels until you know whether your format actually needs them. A suitable microphone, headphones, and a quiet location are a more useful foundation than accessories without a clear purpose.
- Prioritize: a compatible microphone, closed-back headphones, and a stable stand.
- Consider later: an interface, portable recorder, or additional microphones, depending on the number of participants and the recording location.
- Wait until you need them: a camera, mixer, and large quantities of acoustic panels.
Before you buy, check what comes with the microphone. A model may require a stand, cable, adapter, or pop filter sold separately. Compare the cost of the complete setup and make sure the device works with your computer, phone, or operating system.
Recording checklist before publishing
A quick setup check can prevent problems that would be difficult to fix during editing. Use the same cables, inputs, and settings you’ll use for the episode.
- Check that the correct microphone is selected in your software and plug in your headphones.
- Turn off notifications and, if possible, move away from avoidable noise sources.
- Record a few seconds of test audio and listen for echo, hiss, plosives, and uneven volume.
- Check whether the audio distorts during the loudest parts and adjust the gain before you start.
- Confirm you have enough storage space, and make a backup recording if the episode is important.
The Library of Congress website provides information about preserving digital materials. For a simple workflow, this reinforces a practical precaution: keep a copy of the original file before editing and exporting the final version.
Next steps for choosing without buying on impulse
First, decide on the show format: solo, remote interview, or in-person conversation. Then note how many people will speak at once, where you’ll record, and which device you’ll use. These factors will tell you whether a USB microphone will do the job or whether your project calls for XLR inputs and a recorder or interface.
Before investing in a complete kit, record a test in your chosen space and listen with headphones. Note the most obvious problem and buy only the item that addresses it; this approach helps you avoid spending on accessories that won’t improve voice quality.
Frequently asked questions
Can I record an episode using my phone’s microphone?
Yes, especially for testing your script and show format. Record in a quiet place, keep your phone steady, and check the audio with headphones; then compare the result with a dedicated microphone before deciding on your publishing standard.
Do I need to buy a microphone for each participant?
For in-person interviews, individual microphones make it easier to control volume and edit each voice. A single microphone may work in some situations, but unequal distances between speakers tend to make the recording less consistent.
Does a pop filter improve every kind of recording?
It helps reduce the impact of plosives, but it won’t eliminate echo, background noise, or distortion. Proper microphone placement is still necessary.
Do I need to pay for editing software?
No. Free tools are available for recording and editing audio, and they can work well for a new podcast. Consider a paid option only if you need specific features that make a difference to your workflow.
%%AGPTRH5%%
Artigos Relacionados
 Entrepreneurship Podcasts for Sales: Topics That Convert
 Digital Entrepreneurship: 9 Essential Strategies to Build a Successful Online Business and Achieve Financial Freedom in 2026
 Design Thinking for Creative Businesses: Apply Innovative Methods to Solve Problems, Develop Unique Products, and Win Loyal Customers
 Creative Entrepreneurship: Turn Your Passion Into a Profitable Business, Stand Out in Crowded Markets, and Build an Authentic Brand
 Entrepreneur Biographies: Real-World Lessons to Avoid Common Mistakes and Grow Your Business Faster
 Sales and Marketing Books: Proven Tactics to Convert Leads into Paying Customers and Grow Small Business Revenue